Monday, July 19, 2010

Meet Ted!

Last weekend we decided to adopt a dog for our family. His name is Ted and this is his third adopted home. His birthday is May 19, 2009 and he is a Manchester Terrier.

 Ted in the backyard. This is not a good picture because it makes him look a lot taller.
 

The first family loved Ted but their son was allergic to him and had to give him up. The second family adopted him but the husband was out of town and when he came back home he did not want a dog so he brought Ted back. When we went to pick him up he was very scared but soon warmed up to us. We took him on a walk in this big field and we knew he was going to come home with us. One of the volunteers at the rescue told us he loves to catch snakes. He is a great car rider and loves to play but he can snuggle down when we watch TV.When get home and once he sees my 15 year old cat, Silly, he starts barking. This is the first time we hear him bark. We decided to put the cat in a separate area till Ted learned the house. We did not want Ted sleeping with us, so we put him downstairs with the cat separate from him. Silly decided to be the mean cat from the movie Babe and Ted barked and was scared at him. We decided to go downstairs and see if he would sleep with us on the couch. He still could not sleep until he could not see Silly. Once we closed Silly in the bathroom for the night Ted falls down and puts his head on the pillow. After a week they can now be left alone in the same area. Silly does not love him but deals with Ted.

Silly and Ted on the couch together. It does not last long!

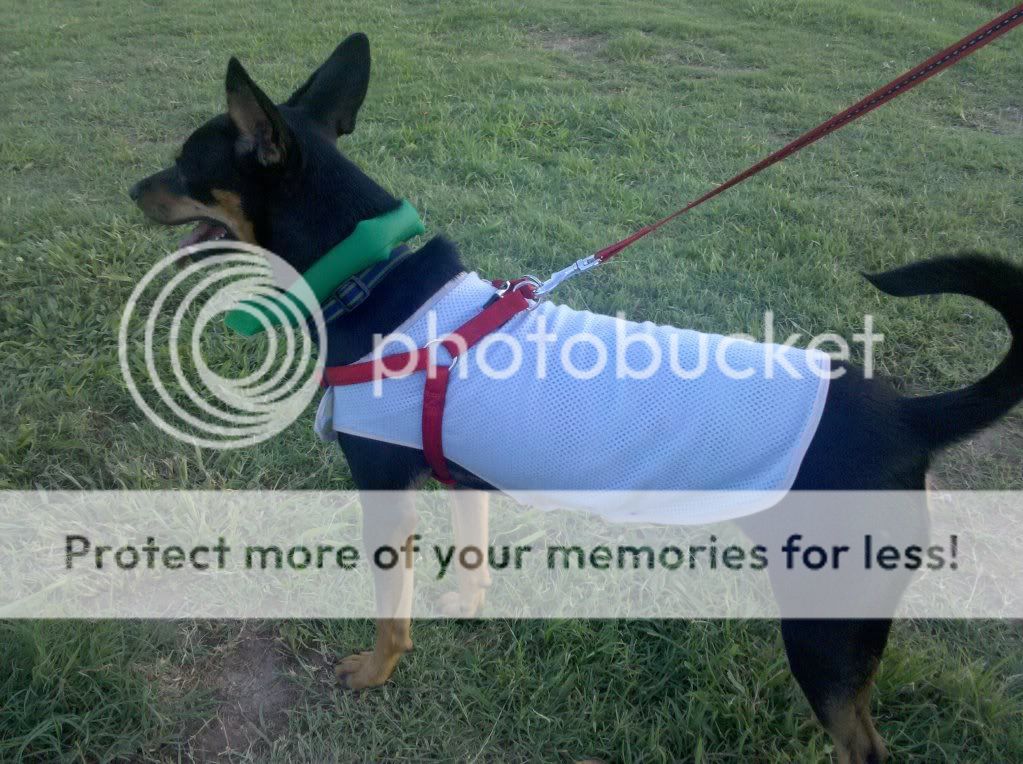
One of the requirement I could not be a dog parent who dresses dogs. With his short black hair he gets very hot when we are outside. I decided to make him a sun jacket to let him be cooler. This is the only outfit Ted can wear. I will make him a winter coat when it gets colder. I do not know if it really keeps him cooler but he looks very good in it. I found the pattern off of Martha Stewart's website. I had to make the neck and chest area smaller to fit his size. The material I used is from basketball/workout mesh I found cheap on the clearance material at JoAnn's. I also made Ted a cool neck roll in green that he wears when we go on walks.

Ted with his green cool neck roll and his new sun jacket at the baseball field.
The next day after we get Ted, D's parents also adopted 2 dachshund named Colby and Brady. Their birthday is in September 2009. They are still very young and not as mature as Ted. They were owned by an older lady but she went into hospice and died. Her children took care of them but only fed them chicken bones and trash. They have to be touching each other at all times and if one is doing something the other has to do it. They love to run around the yard and chase each other. We brought Ted over and they do not really like him. We are going to training with them starting next month.
Colby (black nose)

Brady (pink nose)

Thursday, July 1, 2010

Miss to Mrs

With the wedding over now I can post some of the crafty ideas I did for our wedding in June. 

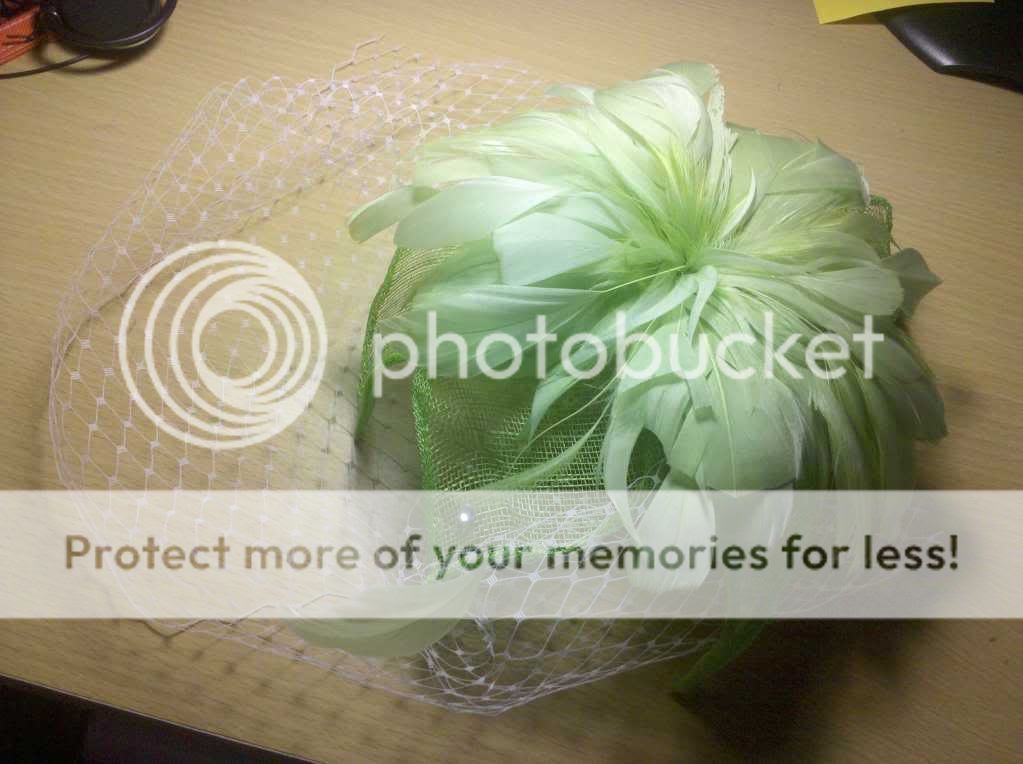
Birdcage veil with green flower
Knew I wanted a birdcage veil but did not find exactly want I wanted. I bought a birdcage veil kit off of etsy.com for $15. I should of just bought the netting because I used a different clip from Jo-ann's. I have been working/looking for the perfect flower for a long time. I bought a headband with flower from Claire's but was not it. I went to Charming Charlie's and my MOH found the green flower. It was on a headband with the flower and green Russian netting. I took off the headband and cut off the green netting. I hot glued my white netting inside and hot glued the clip in. Make sure you put the clip in the correct way in the hair. When I had my hair done we put extra hair pins to hold down the netting and flower. With the completed project I spent around $40 but could be less.


Hidden Mickey Heads
Another hair item I did was glued rhinestones to the end of hair pins (they are "u shaped" and can be found at Sally's). I also made some Mickey Mouse heads by gluing a large and 2 small rhinestones on a piece of clear plastic and cut it out then glued it on a hair pin. 

Life ring guest book
The company who did my wedding sells a life ring you can use as a guest book with your name and date with just vinyl lettering for $150. I found a life ring on Amazon for around $30. I was disappointed because it has been sitting in the box for a while and the white rope made a brown lines on the ring part. I put that in the back so you can not see it. It ended up a success and is hanging in our downstairs bathroom. I found the Disney cross stitch in the clearance section at Michael's. On of our friends thought it would be cute to have a digital picture frame in the middle. I liked the idea but there was no power outlet where it would be located.


Digital picture frame
With the digital picture frame out of the question in the life ring I still wanted it in the wedding. I loaded up pictures of us a children and pictures of us the past years together. DH has seen tons of pictures of me but I had not seen a lot of pictures of him when he was a child. The wedding planner put it in the bar and was good to see pictures from the past.

There was more items I made but that will be for another day.

Thursday, April 29, 2010

Maryy Dress

I have had this great sewing machine for months and only have repaired clothes and made hedgehog bags. I have been looking for a dress for the brunch before the wedding but have not seen anything that really screams out to me. I found this dress on Burda Style and it was my favorite price of free. I made D take me to Joann's 30 minutes before they closed Tuesday  and we quickly picked out these two fabrics. It reminded me of the wedding colors and I knew D wanted to leave as soon as possible. It only took me around 8 hours to complete this dress. I took my time and did it right so one can find a mistake. I had a lot of issues with the pattern size and had to make it smaller while making it. I have never done an invisible zipper before and did not iron down the zipper like the instructions said so I had to take out the zipper to redo it. Then I sewed the zipper so it did not line up right.
I was surprised how easy it was to make, and next time I made a dress like this I will not make as many mistakes. I wanted it strapless but I was having some issues keeping it up in the back so I added the straps at the end. I made them cross in the back but also can not be crossed because of the buttons.
I am never a big fan of cotton dresses becuase they never fit right. Becuase I could make it fit me it turned great. If I do not wear it to the brunch I know I will wear it on the honeymoon.

Wednesday, January 27, 2010

Bucket wheel stand on side of cage

HOW TO ATTACH A BUCKET WHEEL TO THE SIDE OF THE CAGE

With the new cage I knew it would be easy to mount the wheel on the side of the cage. I think you could do this same method on the Sterilite container also.
Below is a list of supplies I used. You will have to figure out the length and diameter of the carriage bolt that will fit your wheel and cage thickness.
Supplies (All found on the bolt and nut section in Home Depot)
1- ¼’’ 3” lag or carriage bolt
4- ¼” 1” hex machine bolt
2- ¼”x ½” nylon spacer (this gets the wheel away from the cage some. They are in the pull out trays at HD)
9- ¼” large washers
4- ¼” split washer
4- ¼” nut (you could use a wing nut for this)
1- ¼” wing nut
2- 6”x8” -¼” plywood (You can buy this in 2’x4’ sheets at HD, in the wood section)
Other tools
Circular saw, sand paper, and drill

1.       You will have to cut the wood, to the desired size. You might need to sand the edges. Drill a hole in the middle and the 4 corners. Make sure it lines up with the metal bars. Make an arrow on both pieces of wood so they will line up when you are putting it on.
2.       Put one of the large washers on the 4 bolts. Only put one washer bolt combination in one piece of wood at a time. Put on the cage then put on the other sheet of wood on the other side of the cage. So the wood is the bread and the cage is the meat inside of the sandwich. Add another large washer, lock washer and a nut at the end of the bolt. Do this for the other 3 holes. I put the nuts so they are outside of the cage.
3.       Put the lag orcarriage bolt in the middle hole and put the large washer and 2 spacers. Add wheel and use wing nut to tighten. I found the wing nut is a lot easier to get the wheel off and on.
4.       This does not allow a tilt like a pvc pipe stand but Ace has no problem staying inside the cage when running. Make sure it is low enough for easy in and out of the wheel.
Outside of cage
(nylon spacers are not in this photo)


      Inside of cage


Side view
(nylon spacers are not in this photo)


View from back


Inside cage
(you can kind of see the nylon spacers (white) in this picture behind the wheel)


Ace checking out the new cage! :)


Tuesday, January 12, 2010

How to cut a 5 gallon bucket for a hedgehog wheel

I made this tutorial because I have not found one that helps you cut the bucket for the wheel. I think that is why people use the cake carrier lid. After cutting myself on the first wheel, I knew there was a better day. This process has risks because I use a soldering iron with a sharp blade, a knife and a drill. If you do not feel comfortable using these tools try to find someone else to make the wheel for you.

Tools
Soldering iron with knife blade
5 gallon bucket
Ruler
Permanent marker
Painters Tape
Rollerblade wheel
Zipties
Knife
Assorted Files
Sandpaper or rubber sanding block
Drill with assorted drill bits.
Paper towels
Table (do not use anything nice)

Where to buy
Soldering iron: I purchased a soldering iron kit at Walmart, but I have seen then them at Hobby Lobby and Michaels. Do not forget your coupons. They might be in the wood section or jewelry. This is one from Amazon.
5 gallon bucket: Home Depot and Lowe’s has the best price on buckets. They are not the thickest wheels but are good.
You might be able to get free buckets at a food establishment like at the bakery at the grocery store or a doughnut shop. Stay away from buckets that were used with cleaning products.

Tips
Bucket thickness
Buckets come in different thickness (mil). Look at the bottom of the bucket and it should have it there.  On my first wheel it is 100 mil. This is the thickest bucket I have seen and I have no sagging. The buckets at Home Depot and Lowe’s are 70 mil. I have researched online and you can get a 5 gallon food grade buckets. They are 90 mil but they cost more in shipping than the bucket so asking food establishments might be the only option.

Making the cut


This is what the soldering iron looks like with the blade on. Make sure you preheat the soldering iron before you make the cut. Make sure the cord is not in the way of the tip or other objects.  Also make sure your outside or have a fan on in the area to vent the fumes from the plastic. It gets stinky!

1.       Measure around the bucket 6 inches every few inches around and make a mark with the permanent marker. Once you have it marked you will put the painters tape on the top of the mark around. This will be your guide when you are cutting it.


2.        With your painters tape you will tape the top of the line like the photo below.


3.       Get some paper towel and place it close by folded up some. Once your soldering iron is hot enough, slowly start the cutting. I moved the blade up and down but do not go down all the way or the shaft of the iron will melt the plastic and it becomes messy. Have the fan on or you will get smoked out from the burning plastic. I put some pressure when I am cutting but try not to rush it or you might break the tip.


 When the knife is covered in the plastic I like to clean it. Get the paper towel on the edge of the table and wipe the blade. Do not keep it on long or it might catch on fire. The brown areas are the burning part.


Another cutting action shot


Cut apart!


The wheel


4.       The edge of the wheel is not ready so we will have to file and sand it down


I use a Leatherman’s file and knife. Be very careful with the knife, they are sharp!
Move in a backwards motion to get the big chunks off. If you feel you cannot do this step then just stick with the file.


I switched over to the file and went around the wheel


Then I went for the rubber sanding block. I love using these because it can fit inside of the lip and get it very smooth. You can see the difference this step does on the edge. Make sure you feel around the edge and get all sharp areas.


5.       This is the time you can position the holes for the wheel. You can drill out the middle first. I used a small drill bit then moved up in size till I had the diameter of the metal part of the skate wheel. You make it big so you can get the screw on tight. Also make sure it is not that big so you do not have space to put the zipties.

You do not need to use that small of a drill bit.


6.       Put your roller skate wheel in the middle and trace around the edge. Then make a mark to show where to place the holes on the line. You can see that below.


You have your line around the wheel and you only need to put 3 lines to show the holes. You will be drilling the middle of the wheel, inside of the wheel and outside of the wheel. The pictures below will help. Once you have your holes drilled I used rubbing alcohol to remove the permanent marker.


This is the size of the middle hole and without marker on it. I forgot I made it this big so the other pictures below have it with the maker and smaller hole.


Place the wheel on the bucket and place the zipties in the middle first and make sure it is the right direction to get them closed.


Make the top of the ziptie on the side like on the right or it will be sticking out of the front. Once you have it tight cut off the ends but leave a little on.


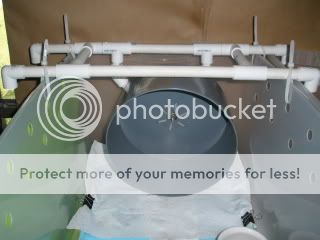
The base I made was from Hedgehog World website. I flipped it upside down and place it on the top of my cage so he would not use the bathroom on the pvc pipe. Now I have a critter nation cage and going to attach it to the bars. I am still keeping the PVC pipe stand when we travel. Below are some pictures of the reverse wheel.


Trying it out but it was during the day so Ace decided he wanted to sleep more

Monday, January 11, 2010

Christmas gifts part 1

I just eyeball it when I am making lip gloss but this time I weighed it out.

  • 5oz beeswax
  • 6oz olive oil
  • 30 drops of fragrance oil (use your own judgment on how much)

I melt down the beeswax and part of the olive oil in 2 bathroom paper cup in the microwave. I think it could handle just one cup but I rather not take that risk. I keep on adding olive oil and use a toothpick (do not double dip if you are giving it to friends) to test the texture of it with your fingers or lips. Once it feels smooth I put the drops of fragrance oil till it has the right about of scent you are wanting. You might need to warm it up after putting the extra oils. Pour in lip gloss tubes or pots. I tell my friends I will refill it for free if they give me back the tube or pot.

You can get the beeswax at Hobby Lobby. I get my fragrance oil at Bath and Body Works. It is normally $7.50 a bottle but I can get them after a big holiday for only $3. I also mix beeswax and the oil in a glass jar and put it on a candle warmer. It makes the house smell so good without using a flame.

I am back and have a new room!

I have not updated in a while but I have been crafting. I have moved, and bought a house! Now I have my own activity room that I share with my DF. With the new house and not having a full time job I am finding ways to keep me busy while saving money.

Landry Detergent

I made my own laundry detergent using this recipe. It smells fresh and gets clothes clean. I use a 7 gallon water container that we bought during one of the hurricanes and did not know if the water was going to off after the storm. We bought ours at Wal-Mart in the camping supplies.

I went to Wal-Mart for the supplies, but they did not have the washing soda. They did not have Fels Naptha soap but had Pink Zote and it smelt good so I bought it. The Zote soap bar was bigger so I estimated 1.8 oz for the recipe. I went to Kroger’s after and they had the washing soda and had the rest of the supplies for the future. I made a double recipe because I had a big container. I grated the soap with the microplane grater but I think if cut the soap in small chunks it would be ok. I only added 6 cups of the water to the big pot to dissolve the ingredients. I have a wide mouth funnel to put the water into the container and that was a big help. When adding the water to the container I would tally how many cups you have put in so if you have to do something else while making it you will know where you left off. It looks like egg drop soup when you pour it out. I keep the container on a shelf in the laundry room. I have a clear cup to put the soap in and I made a line around with electrical tape to show how much to put in. I have a front loading washer so it has the pull out tray for the soap and has another gauge for it. I lift the soap container up and down to stir the soap around and pour it out. With that valve you have to remember to have it fully closed. Once I bumped in it and spilt soap on the ground. I have supplies to make at least 3 more batches of soap!

Instant Breakfast

We both like to drink the powdered instant breakfast. I knew I could make my own and researched this recipe.

One 3oz box instant pudding (I used sugar free)

1/3 cup sugar

12 scoops protein powder

6 cups instant dry milk

Mix together in a gallon size bag. Use 1 cup of water or milk and ad 1/3 cup of mix and stir.

I have made vanilla and chocolate. I picked all of the supplies at Kroger’s. I have not figured out the savings because the protein powder is the biggest expense. I like it because you can make large quantities of it, make any flavor you want and you just use water so you do not have to worry if you have milk. The taste of instant dry milk is different than what you buy from the store so you might not like it. When we go on our Disneymoon in June I am going to put a serving in a snack size baggie for breakfast.